SCHEDULES
 How do I manage schedules?
Open a project and select the 'Manage Schedules' tab to create and modify schedules.
-
Getting started
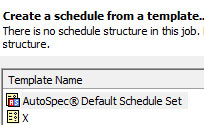
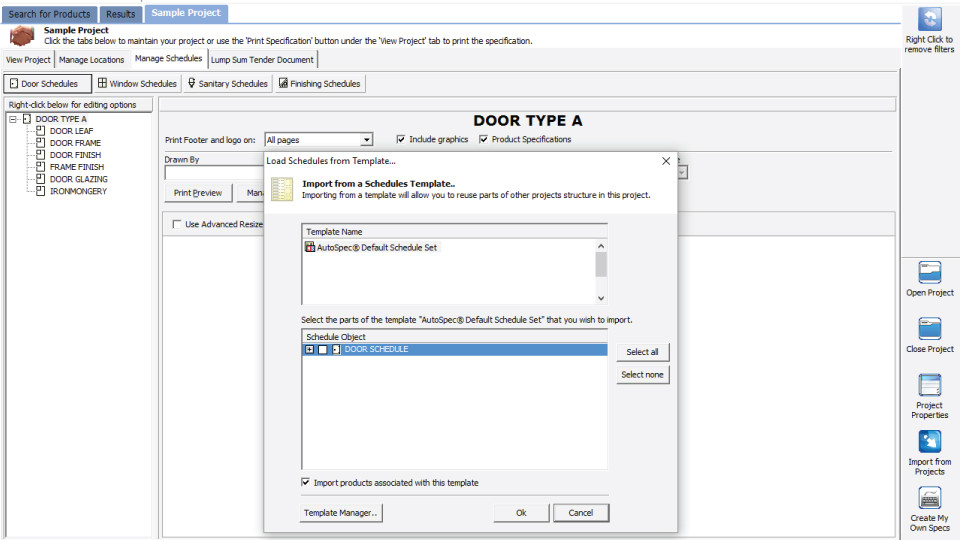
AutoSpec comes with a default template set. This default template set will automatically be included in any new project.
You can also import schedules from other templates by right-clicking anywhere in the tree section on the left and selecting 'Import from template'.
NOTE: If the template you selected has any products attached to them and you would like to import those same products into your schedules, please ensure that the "Import products associated with this template" box is ticked.
AutoSpec will now display all the schedules that you have selected to load from the templates. -
Menu Functions
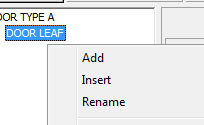
To access the menu right-click anywhere in the whitespace or on an item.
- Add - Adds the node to the end of the tree on the same level that you clicked 'add'
- Insert - Inserts a node above where you clicked 'insert'.
- Rename - Change the name of the node.
- Copy and Paste - Duplicate nodes, includes all sub-nodes.
- NOTE: You will be asked if you want to copy all linked items to the New copied node. Clicking 'yes' will attach all products that you have already sent to the schedule and paste them into the newly created node as well.
- Delete - Remove the entire node or a single node. This removes the product from the schedule as well.
- Unlink products attached to this node - Clears products attached to the selected node but leaves the node in place to be populated with alternative products.
- Export to template - Takes your currently selected schedule and saves it for future use. You could then create several custom templates and re-use them for different projects. You can either export the schedule into a new template or into an existing template.
- Add - Adds the node to the end of the tree on the same level that you clicked 'add'
-
Adding Products to my Schedule
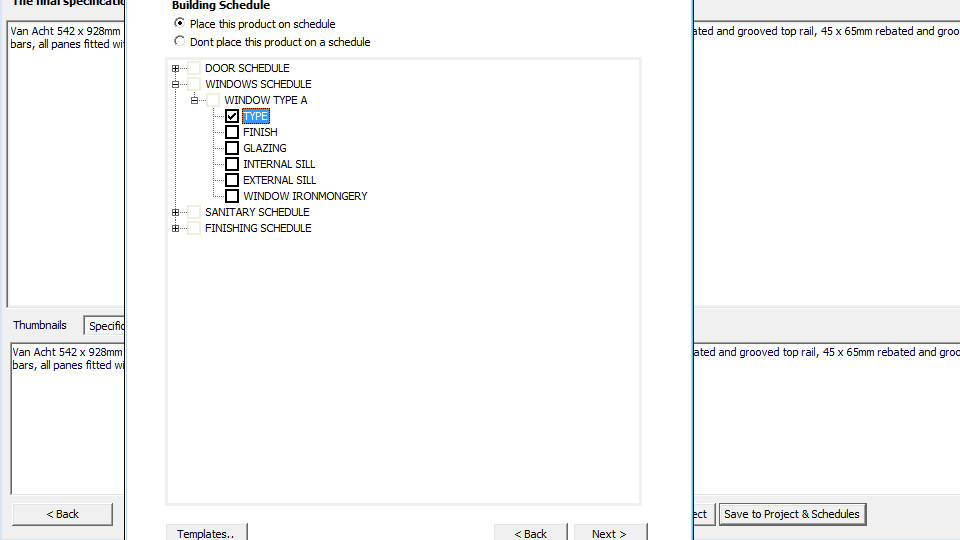
When a product is selected in PowerSpec clicking on 'Save to Project & Schedules' will bring up the 'Send product to project' window. Select your project and click 'Next'.
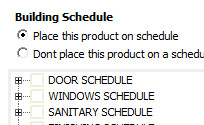
Select the type of schedule you want to use and allocate your product to a node.
NOTE: You cannot add a product to the top level node i.e. DOOR SCHEDULE or DOOR TYPE A. You can only add it to the lowest level nodes i.e. DOOR LEAF, DOOR FRAME etc. -
Node Types
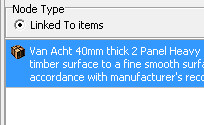
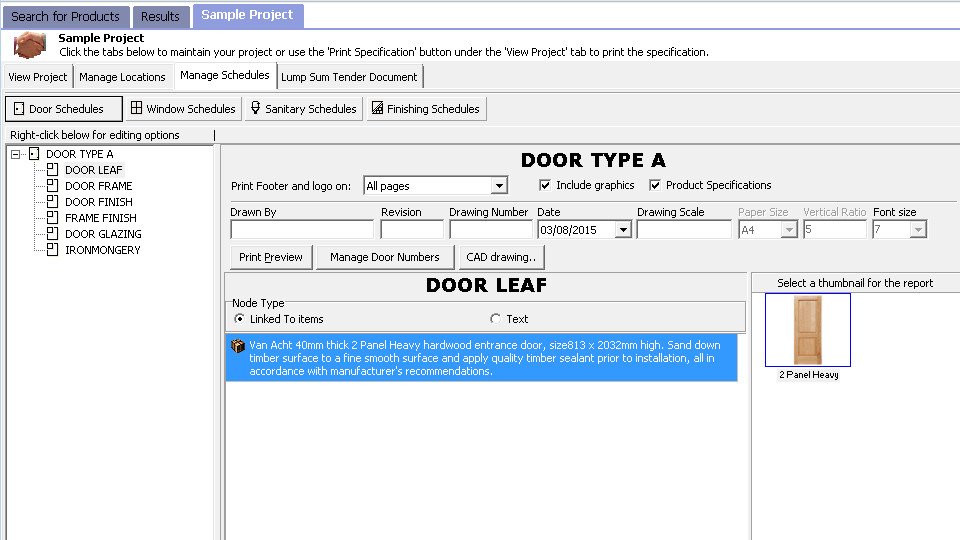
There are 2 node types: Linked to items; and Text.
- Linked to items - These are specifications and images that are linked to the nodes from PowerSpec. The position of the product in the schedule is displayed. Your product specification is displayed and you can right click it and select 'Open in wizard' to open the product in PowerSpec or select 'Edit specification' to change the specification text. Thumbnails associted with the selected product are displayed to the right of the spec text.
- Text - This is plain text that can be inserted onto the schedule instead of the product specification. You could also write a custom note or reminder here.
- Linked to items - These are specifications and images that are linked to the nodes from PowerSpec. The position of the product in the schedule is displayed. Your product specification is displayed and you can right click it and select 'Open in wizard' to open the product in PowerSpec or select 'Edit specification' to change the specification text. Thumbnails associted with the selected product are displayed to the right of the spec text.
-
Report Details
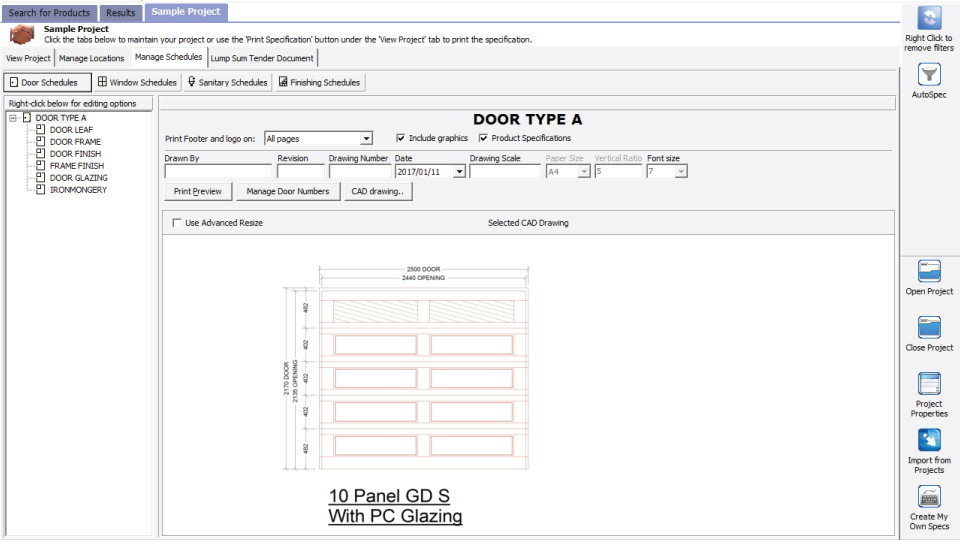
- Print footer and logo on - Print the logo and footer on either the last page or all the pages of the document (See Print Preview).
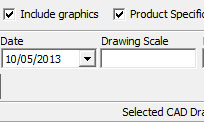
- Drawn By - Name of the person who created the document
- Revision - Revision number of document
- Drawing Number
- Date
- Drawing Scale - Always allocate to Not To Scale NTS as AutoSpec does not scale the drawings imported
- Print Preview - Preview the schedule document
- Manage Door Numbers - Displays all door/window numbers in the current schedule. You can search for specific doors or windows from this screen. To insert a new number simply click on 'Add' and enter the new number. To delete numbers from this screen simply right-click on an item and select 'delete'.
- CAD Drawing - Allows you to either select a custom CAD Drawing by selecting 'Browse' and select the location of your CAD drawing; or one that is already attached to the product.
- Print footer and logo on - Print the logo and footer on either the last page or all the pages of the document (See Print Preview).
-
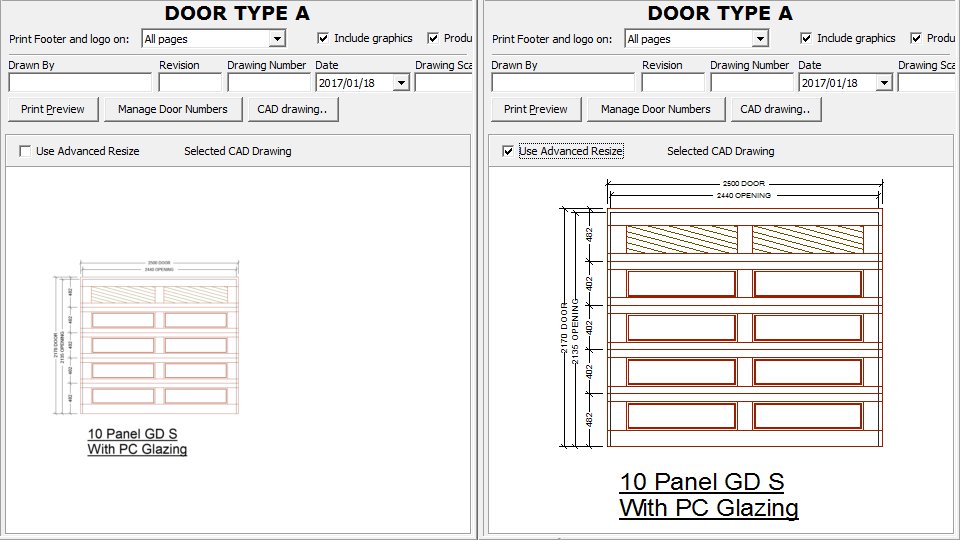
Advance Resize
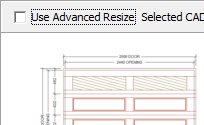
If the CAD drawing does not appear correct there is always one other option, check the "Use Advance Resize" box to see what the advanced resized version looks like.
By keeping the "Use Advance Resize" box ticked you are indicating that you prefer the advanced resized version and your printed schedule will also be resized accordingly.
Please note that Advance resize takes time to calculate. -
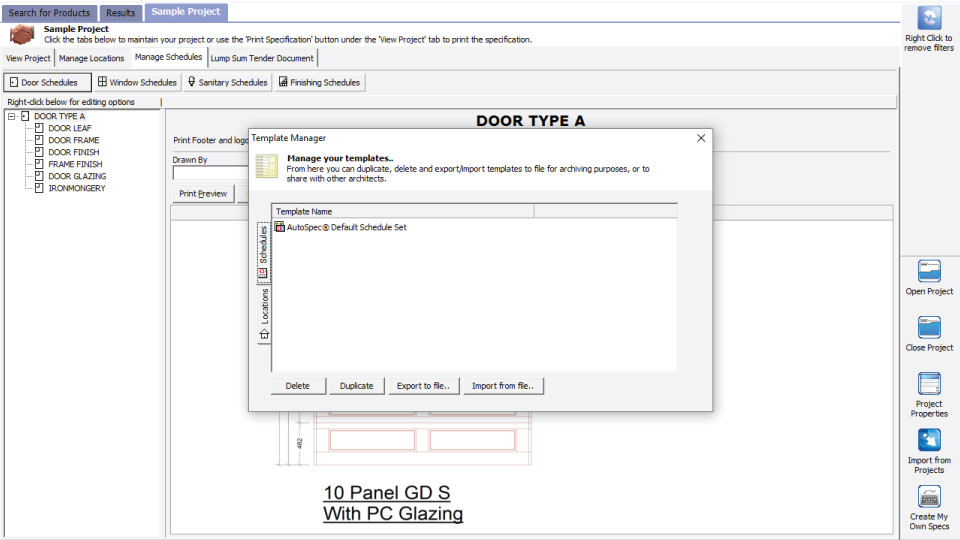
Template Manager
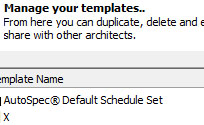
The template manager provides a means to administer both schedule and location templates i.e. export, import delete templates. On the main menu click on File > Template Manager.
- Delete - Deletes existing templates.
NOTE: You cannot remove the Standard AutoSpec Default Schedules Set. - Duplicate - Makes a copy of a template.
- Export to File - Exports a selected template set to a user defined location. You can also then send these via email.
- Import from File - Click on the Import from File button browse to your template and click open.
NOTE: You cannot import a template that already exists i.e. two templates cannot have the same name.
- Delete - Deletes existing templates.